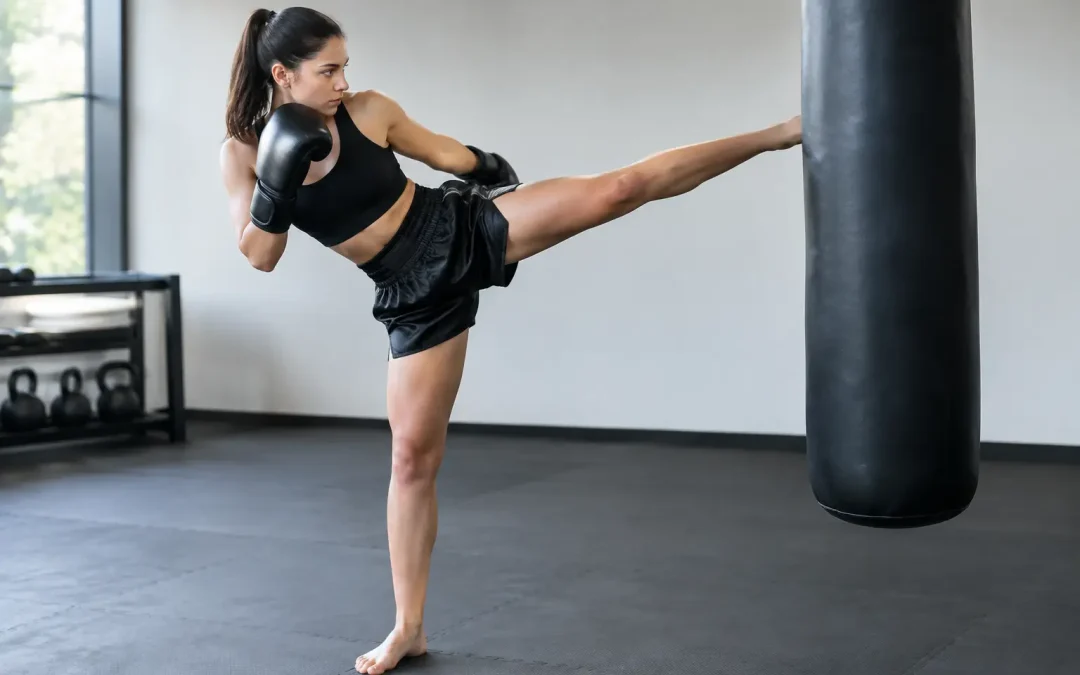
A kick can look powerful, but it only works well when you can stay in control before, during, and after it lands. Learning how to improve kicking balance is one of the most valuable parts of kickboxing training. It helps beginners feel safer, gives children more confidence in class, and allows experienced students to kick with more speed, accuracy, and power.
Good balance is not about standing perfectly still on one leg. It is the ability to stay stable while your body moves, reacts, and returns to a ready position. That takes patience, focused practice, and a willingness to slow down before trying to kick harder.
Start With a Strong Fighting Stance
Balance begins before the kick leaves the floor. If your stance is too narrow, too tall, or too heavy on one leg, even a basic front kick can pull you off line.
Stand with your feet about shoulder-width apart, with one foot slightly in front of the other. Keep your knees soft rather than locked, your hands up, and your eyes forward. Your weight should feel centered and light enough that you can move in any direction. You should not feel as though you are leaning back or reaching forward.
For many beginners, the biggest adjustment is keeping the supporting foot connected to the floor. When you kick, the standing leg does the quiet work. It creates the stable base that lets the kicking leg move freely. Think of it as your anchor.
Try holding your stance for 20 to 30 seconds, then take a small step forward, backward, and sideways without crossing your feet. Return to your stance each time. This simple drill teaches your body where stable positioning feels natural.
How to Improve Kicking Balance by Slowing Down
Fast kicks can hide poor control. A student may be able to throw a quick roundhouse kick but stumble as soon as the kick misses a target or is held in the air. Slow practice shows exactly where balance breaks down.
Start with a chambered kick. Lift your knee into position, pause for two seconds, then place the foot back down with control. Do this on both sides. Once that feels steady, extend the kick slowly, pause briefly, and bring it back to chamber before returning to your stance.
Do not worry about height at first. A controlled kick at waist level will help you more than a high kick that causes you to lean, hop, or drop your hands. Height can come later as flexibility, strength, and confidence develop.
For children, this can be turned into a simple challenge: hold the chamber position while counting to three, then return to guard without wobbling. The goal is not to be perfect. The goal is to improve concentration and body awareness one repetition at a time.
Keep Your Core Engaged, Not Tense
Your core connects your upper and lower body. When it is weak or relaxed at the wrong moment, your kick may pull your shoulders backward, twist you too far around, or make it difficult to recover your stance.
Engaging your core does not mean holding your breath or tightening every muscle. It means gently bracing through your stomach and lower back so your body moves as one unit. Keep your chest lifted, shoulders relaxed, and head level as you kick.
Simple exercises can support this work. Planks, side planks, slow mountain climbers, and controlled knee raises all help develop the stability needed for kicking. A few sets two or three times each week can make a noticeable difference, especially when paired with regular class practice.
Young students do not need complicated strength routines. Balance games, bear crawls, crab walks, and controlled standing knee lifts build useful coordination while keeping training enjoyable.
Use Your Arms for Control
A common mistake is letting the hands drop or swing wildly during a kick. Your arms play an important role in balance. They help counter the movement of your legs and protect your head at the same time.
Keep one hand guarding your face and use the other arm with purpose. For a roundhouse kick, the arm on the kicking side may move slightly for balance, but it should not open so far that your body turns out of control. For front kicks, both hands should stay close to guard as much as possible.
Ask yourself one question after every kick: could I defend myself immediately? If the answer is no because your hands are down, your chest is exposed, or you are facing away, focus on the recovery rather than adding more power.
Train the Supporting Foot
The supporting foot changes depending on the kick. During a roundhouse kick, it usually pivots to allow the hip to turn. During a side kick, it must stabilize your body as you lean slightly away. During a front kick, it needs to remain rooted while your knee lifts and extends.
Many balance issues come from forgetting this foot altogether. Students concentrate on the leg in the air and leave the standing foot flat, stiff, or facing the wrong direction. That can limit range of motion and put extra pressure on the knee.
Practice your pivot without kicking. From your fighting stance, turn the ball of your lead or rear foot in the direction your hip needs to travel, then return to stance. Keep the heel light, knee soft, and posture upright. Once the pivot is comfortable, add the kick at low height.
If you feel pain in your knee, ankle, hip, or lower back, stop and ask an instructor for guidance. Mild muscle effort is expected during training. Sharp or persistent pain is not something to push through.
Build Balance With Simple Drills
The best drills are repeated often and performed with good form. Add one or two of the following to your warm-up or home practice, allowing enough room around you to move safely:
- Stand on one leg for 20 seconds, then switch sides. Make it harder by slowly raising one knee into a chamber position.
- Perform five slow front kicks per side, returning fully to stance after every repetition.
- Practice roundhouse kick chambers while holding a wall or chair lightly with one hand. Use support for feedback, not to carry your weight.
- Step over an imaginary line with a slow side kick, then bring the knee back in before placing your foot down.
- Shadowbox for one minute using only low, controlled kicks. Focus on guard, posture, and a clean return to stance.
Quality matters more than volume. Ten focused repetitions are more useful than 50 rushed kicks. As control improves, increase speed, add combinations, or work with pads under the direction of your instructor.
Recover to Your Stance Every Time
A kick is not finished when it reaches the target. It is finished when you have returned to a position where you can move, defend, or throw another technique. This is where real kicking balance shows itself.
After a front kick, rechamber the knee before setting the foot down. After a roundhouse kick, let the leg return under control instead of allowing it to swing you around. After a side kick, bring the knee back in and reset your guard. These details may feel slower at first, but they build safer habits.
Recovery is especially useful for self-defense-focused training. In a real situation, a kick may not land exactly as expected. Being able to regain your footing quickly helps you stay aware and make better decisions.
Be Patient With Both Sides
Almost everyone has a stronger side. That is normal, but avoiding your less comfortable side can create uneven movement and limit progress. Give both legs time, even if one side feels clumsy at first.
Work your weaker side first when you are fresh. Use lower kicks and slower repetitions until the movement feels more familiar. Children and adults alike gain confidence when they see that coordination is something they can build through consistent practice, not something they either have or do not have.
Balance also changes from day to day. Tiredness, growth spurts, stress, tight muscles, and new techniques can all affect control. Treat an off day as useful feedback. Return to the basics, listen to your body, and keep showing up.
At Taylor Martial Arts, students learn that a better kick is not just about how high or hard it goes. It is about discipline, focus, respect for technique, and the confidence to stay composed. Practice your balance with care, and each kick will give you a stronger foundation for the next one.
Recent Comments